Mastering WeVideo for Classroom Creativity

Mastering WeVideo for Classroom Creativity

TECH-920 –  Three 900-Level Semester Units

Embark on an exhilarating journey with ‘Mastering WeVideo for Classroom Creativity,’ where educators are equipped with dynamic, enjoyable, and highly effective teaching tools. Discover the art of creating multimedia content uniquely tailored to lessons, injecting an element of fun into the learning process.


WeVideo stands as a user-friendly canvas, fostering a seamless experience for teachers to assess student learning directly within the app. Unleashing the potential of fun-filled, engaging content, teachers effortlessly elevate student engagement levels, creating an interactive and captivating learning environment.

With WeVideo, the joy of learning transcends traditional boundaries. It’s an intuitive platform designed for educators to effortlessly weave creativity into their teaching methods, ensuring higher levels of participation and enthusiasm from students. Embrace the ease of building connections in any learning setting, making education a journey that is not only effective but also immensely enjoyable.


Register Here!

                       Save Up To $45!
Use this code to save $15 per course: Eric45


“Free” Video Editors

Video editing is one of the most computer-intensive functions most of us use.  Working with large file sizes and the inevitable exporting of your project really works the processor in your device.  Full-featured video editing programs like Adobe Premiere and Sony Vegas Pro are probably overkill unless you are teaching video production, plus they are expensive.  Your school may provide Premier for your school, but kids won’t have it at home or be able to use it on a Chromebook.  Fortunately, there are some free options that will do 95% of what you need for your classroom.

    • If you are in an Apple environment, there is iMovie which is included on all Macs.  There is also an iOS version for iPads, although not as robust as the Mac version.  I have used iMovie for years and teach a class in it and will be the first to admit that its interface is unusual.  It is not hard to learn, it just takes some getting used to.  Once you are familiar, it is quite easy to learn and has some great tools.
    • HitFilm Express is available for Macs and PCs.  It is free and you can pay for add-ons if wanted, but the free version does almost everything you’d want.  It has the traditional non-linear interface like Premier.  It won’t run on a Chromebook.
    • Openshot is an open-source video editor for Macs, PCs AND it can be installed on a Chromebook.  So, here you have a free basic video editor that will run on just about anything.  Now, you are not going to be able to produce a full feature movie on a Chromebook, remember there is not a lot of processing power in a Chromebook, but it will work for most school projects.
    • DaVinci Resolve – This program makes Premier look like it isn’t even trying.  Resolve is what the big boys and girls use in the film industry.  It is completely free and the company makes its money selling gear for the film industry.
    • Canva – Canva is a free cloud-based suite of tools with a huge library of elements.  The video editor is very basic with just one video and audio track and editing clips can be clumsy.  However, it is fantastic at creating small clips that can be imported into one of the above programs.  For example, animated graphics, a lively intro for your morning announcements, etc.

So, there are five possibilities.  I teach classes on all of these programs to teachers looking for professional development and salary advancement.  Of course, there are a ton of resources online for each of these programs.

Canva For Education

Canva For Education

TECH-916-  Three 900-Level Semester Units

Canva for Education is the world’s largest free, online design platform that enables teachers and students to easily create beautiful and engaging designs. Bring your ideas to life with over 60,000 ready-to-use educational templates including worksheets, lesson plans, presentations, posters, newsletters, class schedules, book reports, infographics, and more.

K-12 teachers and students qualify for a free Canva ‘Pro’ account without limitations and since it only requires an Internet connection, it can operate on any device, including Chromebooks, iPads and even smartphones. Canva also seamlessly integrates with popular learning management systems such as Canvas, Schoology, and Google Classroom. Seamlessly collaborate with your team in the same document at the same time. Create talking presentations and pre-record your presentation to share multiple times. Share or export projects as a link, website, PowerPoint, PDF, MP4, and more. Join the thousands of classroom teachers already using Canva to instruct with visually interactive and fun content, both in the classroom and online.

Register Here!

                       Save Up To $45!
Use this code to save $15 per course: Eric45


YouTube For Teachers

YouTube For Teachers

TEC-968N –  Three 900-Level Semester Units

YouTube is a powerhouse in the digital world and this course will cover how you can apply that same level of power into your instruction.  We’ll begin at the very beginning on how to discover and share content that is already online, then move on to how you can create your own content, and then easily make it look professionally polished for all viewers.

All of YouTube’s powerful, yet easy-to-implement tools will be covered, providing you with the knowledge to teach like a pro and effectively communicate video content with your students, whether it is an existing video, something you created, or even a multi-cam live stream.

Learn how to harness and apply this free powerful instructional tool to supplement your student’s lessons in the classroom, virtually, or both.

Sample Lesson From The Course

Register Here!

 Save Up To $45!
Use this code to save $15 per course: Eric45


Install PrusaSlicer on a Chromebook

I have used several slicing programs to prepare my models for 3D printing, but none comes close to PrusaSlicer, which is open-source (free) for all to use.

Unfortunately, up until now, you need a “real computer” to use it as it needed to be installed.  Now, the Linux build can be installed on a Chromebook, making a premier slicer available to any student with a CB.  After creating their model on SketchUp, Tinkercad, or Onshape, they can export the STL file, import it into PrusaSlicer, orient it on the print bed, add supports, slice it and export the gcode.

Here is how to install it on an old, cheap CB I bought for $200 at Costco three years ago.  I wish the audio had been captured better by Loom, but did I mention it was an old Chromebook :-).

Why I Love Prusa 3D Printers

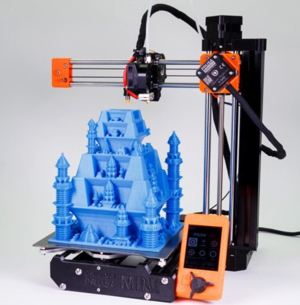
Recommending a 3D printer for the classroom is like trying to hit a moving target as companies come and go, support can be erratic and prices don’t really determine quality.  My classroom has been equipped with 3D printers costing from $300 to $2,500 and each was purchased by someone else from above.  Honestly, the $300 Monoprice model was just too basic, but if you were printing something small, it held its own compared to the $2,500 Taz 6, which is way overpriced.

When it came time for me to spend my own money on a printer for home, I chose one from Prusa Research in Prague.  I can’t tell you if it has one or two zillion hours on it, but I finally had to replace the nozzle ($6) as I had worn the original one out, and I never print with an abrasive filament.  The rest of the printer is still going strong.

There are many reviews on YouTube, so I’ll let you find those yourself, but here are some of the features I love and why I think they are perfect for the classroom.

    • Best bang for the buck, period.
    • All of the parts are open-sourced, so you have many options if you need parts.
    • Decent build volume, even on the Mini.
    • The build plate is made from coated spring steel and held in place with strong magnets.  When you print is done, remove the plate and flex it to pop off the piece.
    • It’s pretty quiet.
    • Their free, open-source slicing software is the best out there.  Even if you are not using a Prusa printer, you should take a look at PrusaSlicer.
    • PrusSlicer can now be installed on Chromebooks.
    • 3-day FedEx air freight at very reasonable prices.
    • Many profiles for printing filament from popular brands other than Prusa.
    • You can save money by assembling it yourself.  My MK3 took me about 6 hours the first time, while I was watching TV.  It comes with the best assembly manual you will ever find, plus there are how-to tutorials on YouTube.

Possible downsides include,

    • Your district may hesitate to purchase from a non-US company.  That shouldn’t be a problem as if they use a credit card, they could always file a dispute.
    • There is no enclosure, which helps when printing materials like ABS where you want to minimize shrinkage/warping.  However, you can build an inexpensive enclosure from IKEA tables and print all the parts yourself.  I did this and it works great!
    • No built-in camera, but you can add an excellent one for about $25 to any printer.

So, those are my thoughts (I have no connection or financial interest with anything mentioned in this post).  For the cost of one Dremel, you can buy one MK3 and two Minis.

I teach a CE online class for teachers on 3D printing and can recommend one more essential, regardless of what printer you use.  BUY THIS BOOK.  It’s $20 and when you run into trouble, and you will, this will be your go-to source for solutions.

Eric

Build A Simple Table With SketchUp

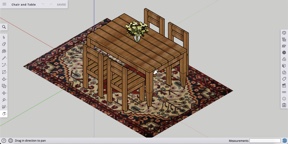
This is a follow-up for students that completed modeling a basic chair with SketchUp. It uses the web-based version of SketchUp, like SketchUp For Schools. No prior experience with SketchUp is really necessary, making this an ideal project for any student. While students could build the table with most of the same skills as building the chair, this lesson goes one step further and introduces different methods that will expand the student’s toolbox and save time. Having said that, you might want to make the chair first 🙂


3D Printing The Combo Wrench In Tinkercad Now Available

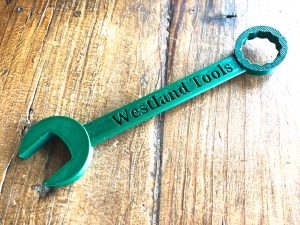
Modeling the combination wrench in Tinkercad has been a popular lesson, so I made a follow-up video on the steps I used to print it.


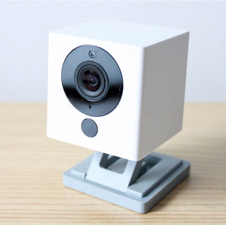
Using An Inexpensive Wyze Cam v2 For 3D Print Monitoring

Being able to monitor your 3D printing job remotely is important, and fun. Some 3D printers come with a camera built-in, but mine didn’t, so to add one, I started with a webcam like you would use with Skype.  The picture was OK, but if I wanted video in 1080p, a new webcam with that resolution was going to be at least $50.

I had a Wyze Cam v2 laying around and wondered if I could use that for monitoring in 1080p HD?  I had previously set it up for my printer, but the only way you could view it was via the Wyze app, and that only works on a smartphone and I wanted more detail.  For $19.99 and a little work, this is a great setup.  Here’s what I did:

  1. If you don’t have one already, you will need a USB 2.0 A Male to A Male Cable.
  2. You will need to flash the camera with the new firmware.
  3. The v2 lens is adjustable if you do a little disassembling.  It can also be replaced for less than $20 if you want a different focal length.  I didn’t feel I needed to do that, but if you want to hunt around, search for “M12*0.5 Mount”

Now that your Wyze Cam is a USB webcam, you can monitor the video feed with a variety of free applications.  Your OS likely already has one built-in like Windows Camera or Mac Photobooth.

I went one step further and installed Octoprint on a Raspberry Pi.  This allows me to view the video feed on my computer, records a timelapse video, and with the Octopod plugin, I can monitor and control my print job remotely.  More on that later.

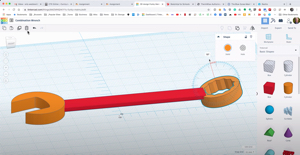
Making A Combination Wrench In Tinkercad

Here’s a fun STEM activity using Tinkercad, Autodesk’s free web-based 3D modeling program.  Tinkercad is an amazingly easy-to-use, powerful program for creating 3D digital designs that are ready to be 3D printed, incorporated into projects, or solve design challenges. This FREE collection of online software tools help people all over the world think, create, make, and Tinker! For teachers, it integrates easily with Google/Tinkercad Classroom and is 100% cloud-based, meaning it will operate on any device that can run a web browser, including Chromebooks and iPads.

For teachers interested in a Tinkercad class for continuing education credits, take a look at STEM-910, Teaching With Tinkercadhttps://ce.fresno.edu/educator-courses/stem-910