Recommending a 3D printer for the classroom is like trying to hit a moving target as companies come and go, support can be erratic and prices don’t really determine quality. My classroom has been equipped with 3D printers costing from $300 to $2,500 and each was purchased by someone else from above. Honestly, the $300 Monoprice model was just too basic, but if you were printing something small, it held its own compared to the $2,500 Taz 6, which is way overpriced.
When it came time for me to spend my own money on a printer for home, I chose one from Prusa Research in Prague. I can’t tell you if it has one or two zillion hours on it, but I finally had to replace the nozzle ($6) as I had worn the original one out, and I never print with an abrasive filament. The rest of the printer is still going strong.
There are many reviews on YouTube, so I’ll let you find those yourself, but here are some of the features I love and why I think they are perfect for the classroom.
-
- Best bang for the buck, period.
- All of the parts are open-sourced, so you have many options if you need parts.
- Decent build volume, even on the Mini.
- The build plate is made from coated spring steel and held in place with strong magnets. When you print is done, remove the plate and flex it to pop off the piece.
- It’s pretty quiet.
- Their free, open-source slicing software is the best out there. Even if you are not using a Prusa printer, you should take a look at PrusaSlicer.
- PrusSlicer can now be installed on Chromebooks.
- 3-day FedEx air freight at very reasonable prices.
- Many profiles for printing filament from popular brands other than Prusa.
- You can save money by assembling it yourself. My MK3 took me about 6 hours the first time, while I was watching TV. It comes with the best assembly manual you will ever find, plus there are how-to tutorials on YouTube.
Possible downsides include,
-
- Your district may hesitate to purchase from a non-US company. That shouldn’t be a problem as if they use a credit card, they could always file a dispute.
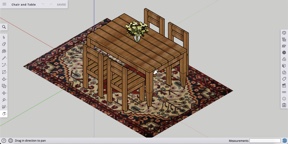
- There is no enclosure, which helps when printing materials like ABS where you want to minimize shrinkage/warping. However, you can build an inexpensive enclosure from IKEA tables and print all the parts yourself. I did this and it works great!
- No built-in camera, but you can add an excellent one for about $25 to any printer.
So, those are my thoughts (I have no connection or financial interest with anything mentioned in this post). For the cost of one Dremel, you can buy one MK3 and two Minis.
I teach a CE online class for teachers on 3D printing and can recommend one more essential, regardless of what printer you use. BUY THIS BOOK. It’s $20 and when you run into trouble, and you will, this will be your go-to source for solutions.
Eric

 Video editing is one of the most computer-intensive functions most of us use. Working with large file sizes and the inevitable exporting of your project really works the processor in your device. Full-featured video editing programs like Adobe Premiere and Sony Vegas Pro are probably overkill unless you are teaching video production, plus they are expensive. Your school may provide Premier for your school, but kids won’t have it at home or be able to use it on a Chromebook. Fortunately, there are some free options that will do 95% of what you need for your classroom.
 YouTube is a powerhouse in the digital world and this course will cover how you can apply that same level of power into your instruction. We’ll begin at the very beginning on how to discover and share content that is already online, then move on to how you can create your own content, and then easily make it look professionally polished for all viewers.
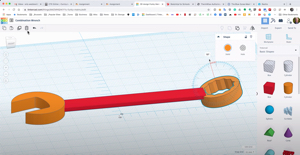
 I have used several slicing programs to prepare my models for 3D printing, but none comes close to PrusaSlicer, which is open-source (free) for all to use.
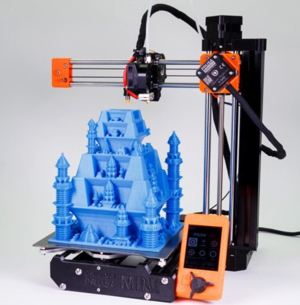


 Here’s a fun STEM activity using